Friday, September 28, 2012

One in Every (Kona) Color: The (Really) Long Version

The giveaway is now closed. Thank you to everyone!
I will try to make this as un-wordy as possible, and just let the pictures speak for themselves. While my quilt is a mash-up of the Kona color card and Pantone, the original spark of interest for the quilt came from here.Lynne's fabulous Penquin Book quilt. I became an immediate fan of the quilt, and also of Lynne.
When I came home from spring quilt market with my charm pack of the new Kona colors, along with a new Kona color card, the wheels in my head started moving.
 I had the idea for the quilt, but how would I obtain a little bit of every single color? I only needed a little, but buying even a fat quarter would be way too expensive.

 That's when I went to Fat Quarter Shop and ordered every sampler charm pack of Kona. I was sure I would end up with many duplicates. I was thrilled to find out that there were hardly any duplicates at all!
I took them apart, and started separating them by color families. Then I started arranging them in order, using the color card.

I used some Pantone note cards for the dimensions for each block.
And started trimming.
The next step was to print out all the colors names and numbers. I had to buy two 25-sheet packs of June Tailor printer fabric. Wowsers--expensive! Thankfully I had good coupons for each pack. Just let me say that if I hadn't had to run so many sheets through my printer, I would definitely have used Kona white and adhered it to freezer paper, carefully cutting it with my rotary cutter, but I was worried about running so many sheets through the printer and jamming it up. I do not like the printer fabric. It served its purpose in this quilt, but it feels and sounds crunchy, which I really dislike. However, it went through my printer like a dream so it got good brownie points for that.

The next step was to proofread each color and make sure I hadn't transposed letters or numbers.

Next came matching the the names with the correct colors.
 Most of these were pretty easy, but there were at least five times when I had to check and double check in different light before I was pretty sure I had them matched up correctly. Case in point:
You can see the difference here, but it took the really good natural daylight before I realized I had them switched around.

And would you believe it, when it came down to it, there were only two colors I was missing: Ruby and Regatta. I was sure I had Ruby because I had used it in a previous quilt. I was pretty sure I didn't have Regatta. I'm not really a "blue" person, but I checked my solids stash, and sure enough, there was Regatta, also used in a previous quilt. Hooray. I think at that point I was sure it was a cosmic decision to make this quilt!

Sewing, sewing, sewing:
The next step was to put each block up on the design wall, duplicating the same order as the color card. There were 243 blocks, but my layout plan of 16 blocks across and 16 blocks down gave me space for 256. That's when I started copying and printing things from the the color card and bordering them in black, including the washing instructions! And that turned out to be a really good plan because with all the color going on, it was a good thing to have a few different places to rest your eyes.
After I made sure, over and over, that all the colors were in the proper order, it was time to start sewing the rows together.
 
And then, as frequently happens with my quilt tops, things came to a complete standstill while I tried to figure out the whole quilting thing. I knew I didn't want a lot of quilting to show because I wanted all the focus on the fabulous colors. I got advice from a couple of people, and then Deborah taught me how to spray baste a quilt on top of a bed (!). Note: I may actually get more of my quilts completed!
At first I thought just quilting horizontally would do the trick, first just below the words in each block, and then in the ditch between the white band and the color block.  But then I realized I wasn't going to be happy until I quilted vertically between each row. The dilemma? While I'm not a fan of quilting in the ditch, I still didn't want the quilting to show. And besides that, there was such a range of color from dark to light that choosing a color of thread, well...I couldn't even go there. So I tried something I had never tried before--monofilament. It turned out to be a great solution. It didn't show on top, but gave a little definition between each row.
I wanted a simple back, but with some pop, so I used the wonky alphabet from Kelby Sews, and pieced a heart with some leftover scraps.
 I finished it with Red Pepper Quilt-inspired black and white striped binding. Really--would anything else have worked? I think not.
And with a nod to Pantone and the color of the year, Tangerine Tango, here is my label.

So that's the story of my color card quilt. It was a challenge I gave to myself and I'm thrilled with how it turned out. My sweet and very supportive husband, Mark, turned out to be very protective of this quilt, or at least the idea of it, and forbid me from posting a single process picture until it was completed.

And in my dreams, Robert Kaufman gives me a lifetime supply of Kona solids. Or wants to add this to their corporate quilt collection. But I'm happy to hang it in my hallway and gaze happily at all the beautiful colors.

I hope you enjoyed reading about my little creative journey, or at least looking at the pictures.

Want "one in every Kona color" for yourself? Well, scraps, that is...these are only about 1 by 5 inches, but I'm pretty sure all 243 colors are represented. Just leave a comment telling me your current favorite color. I'll choose a winner on Monday morning. Have a great weekend!


Tuesday, September 25, 2012

WIP Wednesday: One in Every (Kona) Color

Does this ever happen to you? You have a little seed of an idea. You start working on your little idea and it kind of takes on a life of its own. That's what happened with this quilt.

It probably all started when I decided I loved all things Pantone. I love their simple, yet iconic, block of color with the name of the color.


You get the idea...

Then at spring quilt market in May, thanks to Robert Kaufman, I ended up with not only the brand new Kona color card, but a charm pack with all the new Kona colors. And then the two things, Kona cottons and Pantone, kind of did a mash-up in my head. And a couple of weeks ago I finished "One in Every (Kona) Color." The first people to see the completed quilt were the fabulous people at Robert Kaufman. And currently, in my sewing room, my camera is on a tripod and I'm waiting for good light to take better pictures. But I couldn't wait to share it now that it is officially completed!
This is essentially my re-creation of the Kona color card. I have every single color of Kona cotton, and, in Pantone style, the name of the color and the manufacturer's number.

I love this quilt! It was fun to make, although it required a weekend where I spent hours printing out the names of the colors onto printer-friendly fabric (I'll be doing a review of my thoughts on Friday), checking and double checking to make sure the names were matched with the proper colors and that there were no typos.
On Friday, I'll be posting progress photos and some close-ups. Along with that, I'll be giving away my scraps from this quilt, which basically involve a 1-inch by 5-inch strip of every single color of Kona cotton. I hope you will come back here on Friday.

In other news, I have also been working on My Granny is Amish. I ended up quilting it with no. 8 perle cotton using my sewing machine!
 And I think this black fabric has grabbed every single piece of lint in a two-mile radius!
October is my month for the Stash Trad Bee, and because I seemingly can't get enough of granny squares, I chose that block again, although the great granny square--which has another round of colors, for the start of a Halloween quilt: Granny Says Boo! This is my sample block:
I'm linking up at Freshly Pieced:


Monday, September 24, 2012

The Name Game: s.o.t.a.k.handmade


If you don't already know Svetlana from s.o.t.a.k.handmade, I'm thrilled to introduce her this week.
Svetlana's design style really appeals to me--clean lines and great color choices. So it amazed me to read that she made her first quilt in December 2010, not even two years ago!

Svetlana, how did you choose the name for your blog?


I wanted to include my name in the name of my blog. And, since my first name Svetlana is too long and many people have a hard time remembering it, I decided to go with my last name Sotak.  I thought putting periods between each letter made it look less like a name, yet anyone who knows me would recognize it right away. 


Were there other names you considered and can you share any of them with us?


At first I tried to come up with some cute name, having some owls, or elephants, or some fruit in the name. Unfortunately, every time I thought of something I liked, it was already taken. At the end I decided to drop the cuteness idea and  to include my name in the blog name instead.
Now that you are recognized by s.o.t.a.k.handmade, are you happy with it, or do you wish you could change it to something else?


 I'm pretty happy with it, but I go through stages when I wish it was something else, something a little shorter. At one point I thought about changing the name of my blog but realized that might be too confusing. Instead, I just changed my etsy store name from s.o.t.a.k handmade to the kokoon Now I almost wish I kept it the same as my blog name. Go figure!
 
If you haven't yet been to Svetlana's blog, please head over and say hi. And don't forget to check out her etsy shop which has some really cute items.

Thanks for playing the Name Game today, Svetlana. It was a pleasure to have you stop by!

Monday, September 17, 2012

The Name Game: Grace and Favour

The first thing I want to say this morning is that I am no longer going to apologize for warn you about picture-heavy posts. There are just too many gorgeous photos out there with projects large and small made by quilters agreeing to be on the Name Game. You don't mind, do you? I didn't think so...

Have you gotten to know Carla yet? Her blog title is:

She let me choose the photos this week, and let me tell you, I had the best time going through her archives! I plan on starting from the beginning and working my way up to the present. You should consider doing that too!

Before she tells us how she chose her blog name, I can tell you a couple things about Carla. She loves...
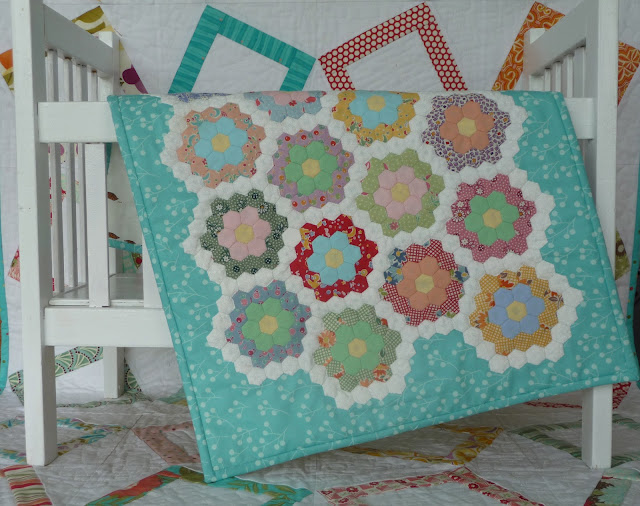
And hexagons apparently love her back!
Beautiful....

Carla, how did you choose the name for your blog?

While flipping through a book, I saw the words "grace and favour". For whatever reason, I loved the sound of the two words together, and wrote them on a little piece of paper, and tucked it away. So much of our dealing with people depends on grace. When I was thinking of starting a blog, I came across that little slip, and knew that would be the name. Grace is one of my favourite words--God's grace.

Low volume quilt from Sunday Morning Quilts
Were there other names you considered, and can you share any of them with us?

I hadn't really considered another name as the blog came together rather quickly.
Now that you are recognized by Grace and Favour, are you happy with it, or do you wish you could change it to something else?
I'm quite happy with the name.. Because I am a bit of a hexagon nut, I imagine a different name would have to include something about hexies : ) For now, it's staying the same.
Please go to Grace and Favour, and say hello to Carla. And spend some time looking around. You will be thrilled with all the inspiration. She is a great writer, a great photographer, and there are so many beautiful things to see on her blog.

I'm closing with these photos of Carla's quilts taken in the snow...because it continues to be 100 degrees here in the central valley of California.
Thanks, Carla, for playing along this week!